全体の流れは以下の様になります。
1)テクスチャーファイルを用意する
2)マテリアルファイルを用意する
3)Material Editorでマテリアルにテクスチャーをロードする
4)Terrain Texture Layersでテクスチャーレイヤーを作る
5)Layer Painterで地形にテクスチャーレイヤーをペイントする
では始めましょう。
テクスチャーは以前の記事に書いた通りに用意します。加えて今回はハイトマップも作りました。(必須ではありません。)
次にマテリアルファイルです。
Lumberyardを起動していない状態で、C:/Amazon/Lumberyard/1.17.0.0/dev/Engine/materialsに入っているmaterial_terrain_default.mtlをコピーし、今回の作業に使うフォルダにペーストします。

今回はdev/starterGameの下に下図のフォルダを作り、そこにペーストしました。リネームもしておきます。

テクスチャーファイルとマテリアルファイルの用意が済んだらLumberyardを起動します。
Tools - Material Editorを実行します。

Material Editorが開きます。

左カラムのリストから、先ほど作成したマテリアルファイルを一つクリックして選びます。

以前の記事に書いたのと同様の手順で各パラメータを設定します。赤い矢印の部分が設定する項目です。

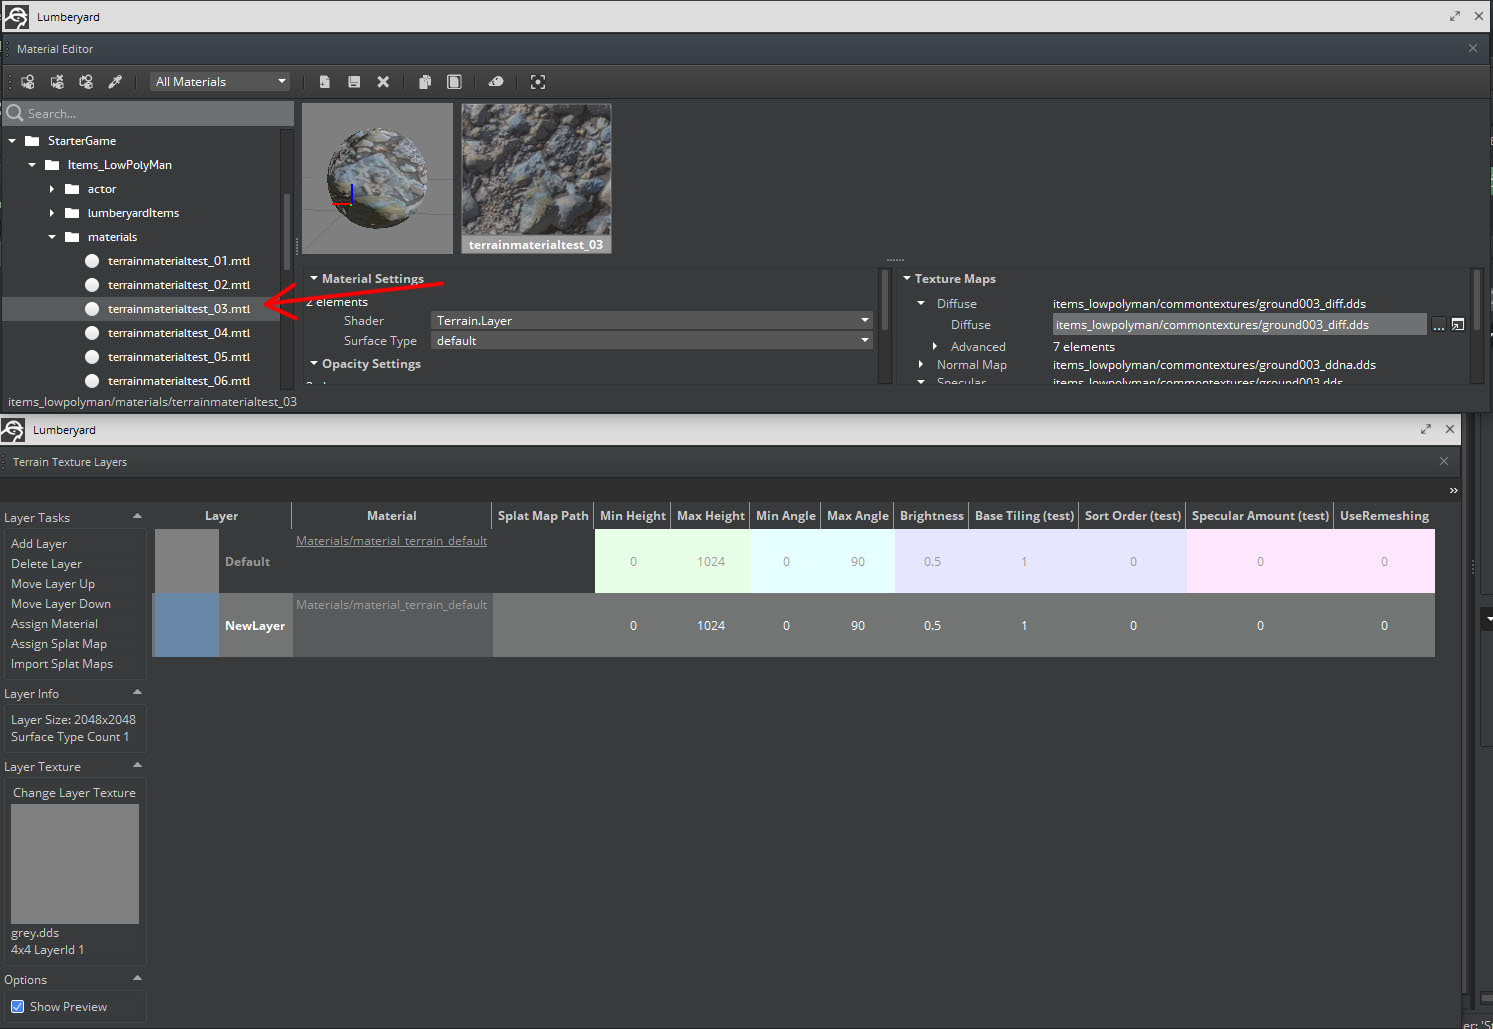
次はTerrain Texture Layersでの作業です。
Tools - Other - Terrain Texture Layersを実行します。

Terrain Texture Layersが開きました。

ここには、地形にペイントする為のテクスチャーレイヤーの一覧と各パラメータが表示されます。現在はデフォルトのテクスチャーレイヤーだけが存在しています。
新規にテクスチャーレイヤーを作成してみましょう。
左カラムのAdd Layerをクリックします。

「NewLayer」という名前のテクスチャーレイヤーが一覧に追加されました。

このテクスチャーレイヤーに、先ほど設定したマテリアルをアサインしてみます。
マテリアルのパス(下図の赤い矢印の部分)をクリックします。

Material Editorが起動します。

Material Editorの左カラムから、先ほど設定したマテリアルを選択します。
その状態で、Terrain Texture LayersでAssign Materialをクリックします。(クリックする前にテクスチャーレイヤーとマテリアルの選択を外さない様に注意して下さい。)

マテリアルのパスが変更されます。

では、作成したテクスチャーレイヤーを地形にペイントしてみましょう。
Tools - Terrain Toolを実行します。

Terrain Toolウィンドウが開きますので、Layer Painterをクリックします。

Layer Painterに入りました。
下の方にあるテクスチャーレイヤーのリストから、先ほど新規作成した「New Layer」を選び、一番下の「Flood」ボタンをクリックします。(注・Floodボタンとリストの間には空白があるので、ボタンが見えない場合はスクロールしてみて下さい。)

「NewLayer」で地形が塗りつぶされました。

デフォルトでは上図の様に、遠くに行くにしたがってテクスチャーレイヤーの表示が薄くなる設定になっています。
設定を変更しましょう。
Terrain ToolのEnvironmentをクリックします。

各設定が表示されますので、TerrainペインのDetail Layer View Distanceの数値を変更します。

20にしてみました。遠景まで塗りつぶされる様になりました。

先ほどと同じ手順で、別のテクスチャーを使い、再びテクスチャーレイヤーを新規作成します。

今度は塗りつぶしではなくペイントしてみます。
新規作成したテクスチャーレイヤーをLayer Painterで選択し、地形の上をドローします。
緑色の線で表示されているのがブラシカーソルです。大きさはRadiusで設定します。

ペイントされました。

模様が細かいのでタイリングの値を変更してみます。
Material Editorで現在使っているマテリアルを開き、TileUとTileVの値を0.01にします。

模様が荒くなりました。

別のテクスチャーを使って、再び新規にテクスチャーレイヤーを作成します。マテリアルのタイリングは同じく0.01にします。

これを崖部分にペイントしてみます。Layer Painterには特定の範囲の高度や角度のみにペイント出来る機能がありますので、それを使って40度から90度の範囲にだけペイントします。
作成したテクスチャーレイヤーをリストから選択しておいて、Slope(deg.)の左カラムの値を40に設定します。右カラムはデフォルトの90のままにしておきます。

山全体をドローします。崖部分だけがペイントされました。

ここで、ゲーム中ではどんな感じなのか確認してみます。

…キャラクターの左側の様にタイリングの値が小さい部分は、近づくとやはり表示が荒いですね。
タイリングが細かいテクスチャーレイヤーを上に薄く乗せて修正してみます。
一番最初に作成したテクスチャーレイヤーをリストから選択し、Detail Intensityの値を0.40にしてFloodをクリックします。

全体にディテイルが重なりました。

ゲーム中でも問題無さそうです。

同様の作業を繰り返し、ライティングを調整して完成です。

No comments:
Post a Comment